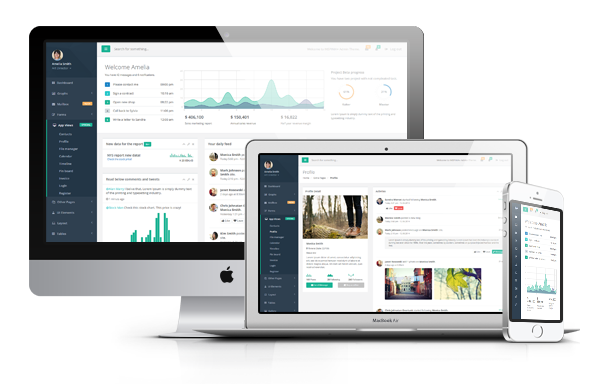
Layout structure
Page <head /> contains Metadata and all CSS files for theme and for all plugins. In your app you can choose only that file that you will use.
<!DOCTYPE html>
<html ng-app="inspinia">

<head>

    <meta charset="utf-8">
    <meta name="viewport" content="width=device-width, initial-scale=1.0">
    <meta http-equiv="X-UA-Compatible" content="IE=edge">

    <!-- Page title set in pageTitle directive -->
    <title page-title></title>

    <!-- Font awesome -->
    <link href="font-awesome/css/font-awesome.css" rel="stylesheet">

    <!-- Bootstrap and Fonts -->
    <link href="css/bootstrap.min.css" rel="stylesheet">

    <!-- Main Inspinia CSS files -->
    <link href="css/animate.css" rel="stylesheet">
    <link id="loadBefore" href="css/style.css" rel="stylesheet">


</head>
Main index.html structure
The body element has only one element
<!-- ControllerAs syntax -->
<!-- Main controller with serveral data used in Inspinia theme on diferent view -->
<body ng-controller="MainCtrl as main">

<!-- Main view  -->
<div ui-view></div>
Layout structure. Each state use template as a layout of page. Layout is located in views/common/content.html file and the structure looks like this:
<!-- Wrapper-->
<div id="wrapper">

    <!-- Navigation -->
    <div ng-include="'views/common/navigation.html'"></div>

    <!-- Page wraper -->
    <!-- ng-class with current state name give you the ability to extended customization your view -->
    <div id="page-wrapper" class="gray-bg {{$state.current.name}}">

        <!-- Page wrapper -->
        <div ng-include="'views/common/topnavbar.html'"></div>

        <!-- Main view  -->
        <div ui-view></div>

        <!-- Footer -->
        <div ng-include="'views/common/footer.html'"></div>

    </div>
    <!-- End page wrapper-->

</div>
<!-- End wrapper-->
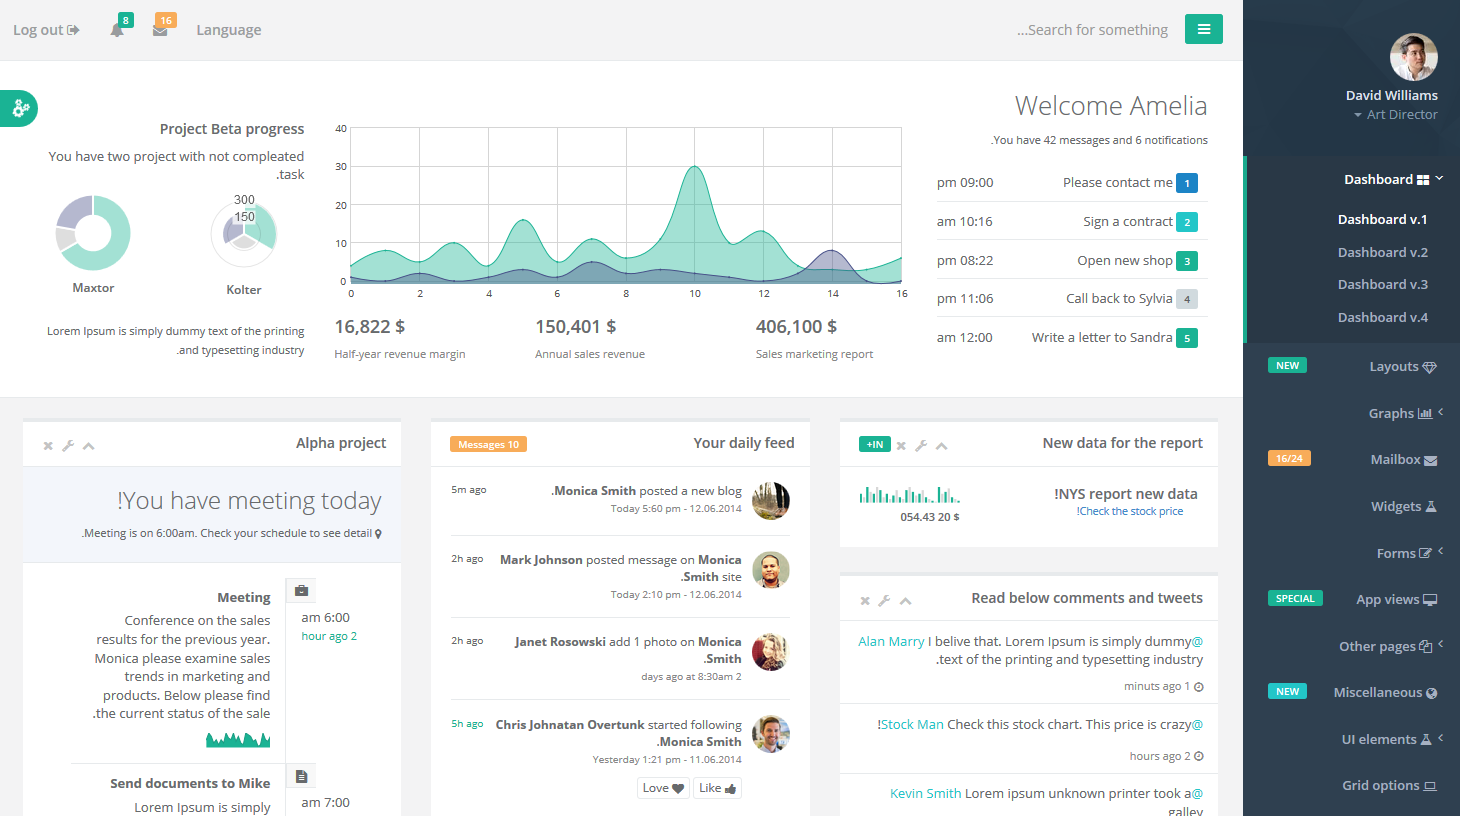
This separation gives you ability to create and modify own layout structure for different pages. For example Dashboard 4 has different layout - content_top navigation (without sidebar navigation).
<!-- Wrapper-->
<div id="wrapper" class="top-navigation">

    <!-- Navigation -->
    <div ng-include="'views/common/top_navigation.html'"></div>

    <!-- Page wraper -->
    <!-- ng-class with current state name give you the ability to extended customization your view -->
    <div id="page-wrapper" class="gray-bg {{$state.current.name}}">

        <!-- Main view  -->
        <div ui-view></div>

        <!-- Footer -->
        <div ng-include="'views/common/footer.html'"></div>

    </div>
    <!-- End page wrapper-->

</div>
<!-- End wrapper-->
Page Script
On bottom of file there are scripts. Index.html contains main plugin scripts. Rest of the scripts (plugins, directive .etc are included dynamical by ocLazyLoad)
After that there is a angular script with controllers and directives files. In Inspinia admin theme we use flat structure of controllers and directives files witch mean that all controllers and directives is in one file.
Of course in live app we will probably separate those functions for separate file and use ocLazyLoad to load it when the app need it. Look at the section with routing to get more info how to load file dynamical.
<!-- jQuery and Bootstrap -->
<script src="js/jquery/jquery-2.1.1.min.js"></script>
<script src="js/plugins/jquery-ui/jquery-ui.js"></script>
<script src="js/bootstrap/bootstrap.min.js"></script>

<!-- MetsiMenu -->
<script src="js/plugins/metisMenu/jquery.metisMenu.js"></script>

<!-- SlimScroll -->
<script src="js/plugins/slimscroll/jquery.slimscroll.min.js"></script>

<!-- Peace JS -->
<script src="js/plugins/pace/pace.min.js"></script>

<!-- Custom and plugin javascript -->
<script src="js/inspinia.js"></script>

<!-- Main Angular scripts-->
<script src="js/angular/angular.min.js"></script>
<script src="js/plugins/oclazyload/dist/ocLazyLoad.min.js"></script>
<script src="js/angular-translate/angular-translate.min.js"></script>
<script src="js/ui-router/angular-ui-router.min.js"></script>
<script src="js/bootstrap/ui-bootstrap-tpls-1.1.2.min.js"></script>

<!--
 You need to include this script on any page that has a Google Map.
 When using Google Maps on your own site you MUST signup for your own API key at:
 https://developers.google.com/maps/documentation/javascript/tutorial#api_key
 After your sign up replace the key in the URL below..
-->
<script type="text/javascript" src="https://maps.googleapis.com/maps/api/js?key=AIzaSyDQTpXj82d8UpCi97wzo_nKXL7nYrd4G70"></script>

<!-- Anglar App Script -->
<script src="js/app.js"></script>
<script src="js/config.js"></script>
<script src="js/translations.js"></script>
<script src="js/directives.js"></script>
<script src="js/controllers.js"></script>

</body>
</html>
Route config / Lazy load
To manage all route we use great plugin Ui.Router. AngularUI Router is a routing framework for AngularJS, which allows you to organize the parts of your interface into a state machine. Unlike the
$route service in the Angular ngRoute module, which is organized around URL routes, UI-Router is organized around states, which may optionally have routes, as well as other behavior, attached.
Below you can see example of configuration ui-view. Configuration routing are in config.js file
function config($stateProvider, $urlRouterProvider, $ocLazyLoadProvider) {
    $urlRouterProvider.otherwise("/dashboards/dashboard_1");
    $stateProvider

        // Other states
        .....

        .state('app.contacts', {
            url: "/contacts",
            templateUrl: "views/contacts.html",
            data: { pageTitle: 'Contacts' }
        })
        .....
        // Other states
To avoid include all plugins files in first load you can include it dynamically. In each state we use ocLazyLoad module to dynamically load required (for state) resources/files.
For example if your view will have a flot chart then you will need have a flot js script files, flot css style files and flot angular directive files. You can of course include it in main index file
but it is suggested to load those files when the app is real need it - in state. Below is example of Dashbard 1 which loads three different plugins: Flot chart, Peiti chart, ChartJS.
.state('dashboards.dashboard_1', {
            url: "/dashboard_1",
            templateUrl: "views/dashboard_1.html",
            resolve: {
                loadPlugin: function ($ocLazyLoad) {
                    return $ocLazyLoad.load([
                        {

                            serie: true,
                            name: 'angular-flot',
                            files: [ 'js/plugins/flot/jquery.flot.js', 'js/plugins/flot/jquery.flot.time.js', 'js/plugins/flot/jquery.flot.tooltip.min.js', 'js/plugins/flot/jquery.flot.spline.js', 'js/plugins/flot/jquery.flot.resize.js', 'js/plugins/flot/jquery.flot.pie.js', 'js/plugins/flot/curvedLines.js', 'js/plugins/flot/angular-flot.js', ]
                        },
                        {
                            name: 'angles',
                            files: ['js/plugins/chartJs/angles.js', 'js/plugins/chartJs/Chart.min.js']
                        },
                        {
                            name: 'angular-peity',
                            files: ['js/plugins/peity/jquery.peity.min.js', 'js/plugins/peity/angular-peity.js']
                        }
                    ]);
                }
            }
        })
In first we load angular flot chart and all necessary files for it. We specify option serie: true to load all files sequentially.
Next you have to add name of module - it has to be the same name as the angular directive has.
In this example angular flot chart directive has name: angular-flot. And finally you must specify all files in array syntax.
Same with ChartJs and Peity charts. The directive for CharJS has name angles and we have to specify this name and specify all files.
The directive for Peity charts has name angular-peity and we have to specify this name and specify all files.
In full version (config file) you can find examples for all resources/directive/files with ocLazyLoad. But if you will include some new plugins you can always
go to directive file and check what is the name of this directive and specify it with name on state lazy laod.
Options
Inspinia provide few option for you layout app. There are:
- Fixed sidebar
- Fixed navbar
- Fixed footer
- RTL support
- Layout 2 (top navigation)
- Off canvas menu
- Skins
Fixed sidebar
Fixed sidebar is a sidebar that is sticked on screen.
To add fixed sidebar you need to add .fixed-sidebar class to body.
<body ng-controller="MainCtrl as main" class="fixed-sidebar">
Next we will need to add slimScroll handle for sidebar. Go to js/directives.js file and find the sideNavigation() function and change it to this:
function sideNavigation($timeout) {
    return {
        restrict: 'A',
        link: function(scope, element) {

            // Call the metsiMenu plugin and plug it to sidebar navigation
            $timeout(function(){
                element.metisMenu();
            });

            // Enable initial fixed sidebar
            var sidebar = element.parent();
            sidebar.slimScroll({
                height: '100%',
                railOpacity: 0.9,
            });
        }
    };
};
Be sure that you have included this files to your index.html file:
        <!-- SlimScroll -->
        <script src="js/plugins/slimscroll/jquery.slimscroll.min.js"></script>
Fixed navbar
Fixed navbar is a top navbar that is sticked on screen.
To add fixed sidebar you need to add .fixed-nav class to body.
<body ng-controller="MainCtrl as main" class="fixed-nav">
Next we will need to change navbar from static to fixed. To do this go to views/common/topnavbar.html file and change .navbar-static-top class to navbar-fixed-top
<nav class="navbar navbar-fixed-top" role="navigation">
Fixed navbar 2
Fixed navbar 2 is a top navbar that is sticked on screen and it's width is the same as the width of wrapper
To add fixed sidebar you need to add .fixed-nav class and .fixed-nav-basic class to body.
<body ng-controller="MainCtrl as main" class="fixed-nav fixed-nav-basic">
Next we will need to change navbar from static to fixed. To do this go to views/common/topnavbar.html file and change .navbar-static-top class to navbar-fixed-top
<nav class="navbar navbar-fixed-top" role="navigation">
Fixed navbar 2 works only on primary layout
Fixed footer
Fixed footer is a bottom footer that is sticked on screen.
To add fixed bottom footer you just need to add .fixed class to footer class on views/common/footer.html file.
<div class="footer fixed">
Right-to-Left Language Support
Adding support for language written in a Right-To-Left (RTL) direction.
To add RTL support you will need to add new .rtls class to body element
<body ng-controller="MainCtrl as main" class="rtls">
Next you will need to add new bootstrap rtl support library bootstrap-rtl. Add new link to css file just below the css from bootstrap in index.html page like this:
    <!-- Bootstrap -->
    <link href="css/bootstrap.min.css" rel="stylesheet">
    <link href="css/plugins/bootstrap-rtl/bootstrap-rtl.min.css" rel="stylesheet">
After that you will have RTL support similar to this:
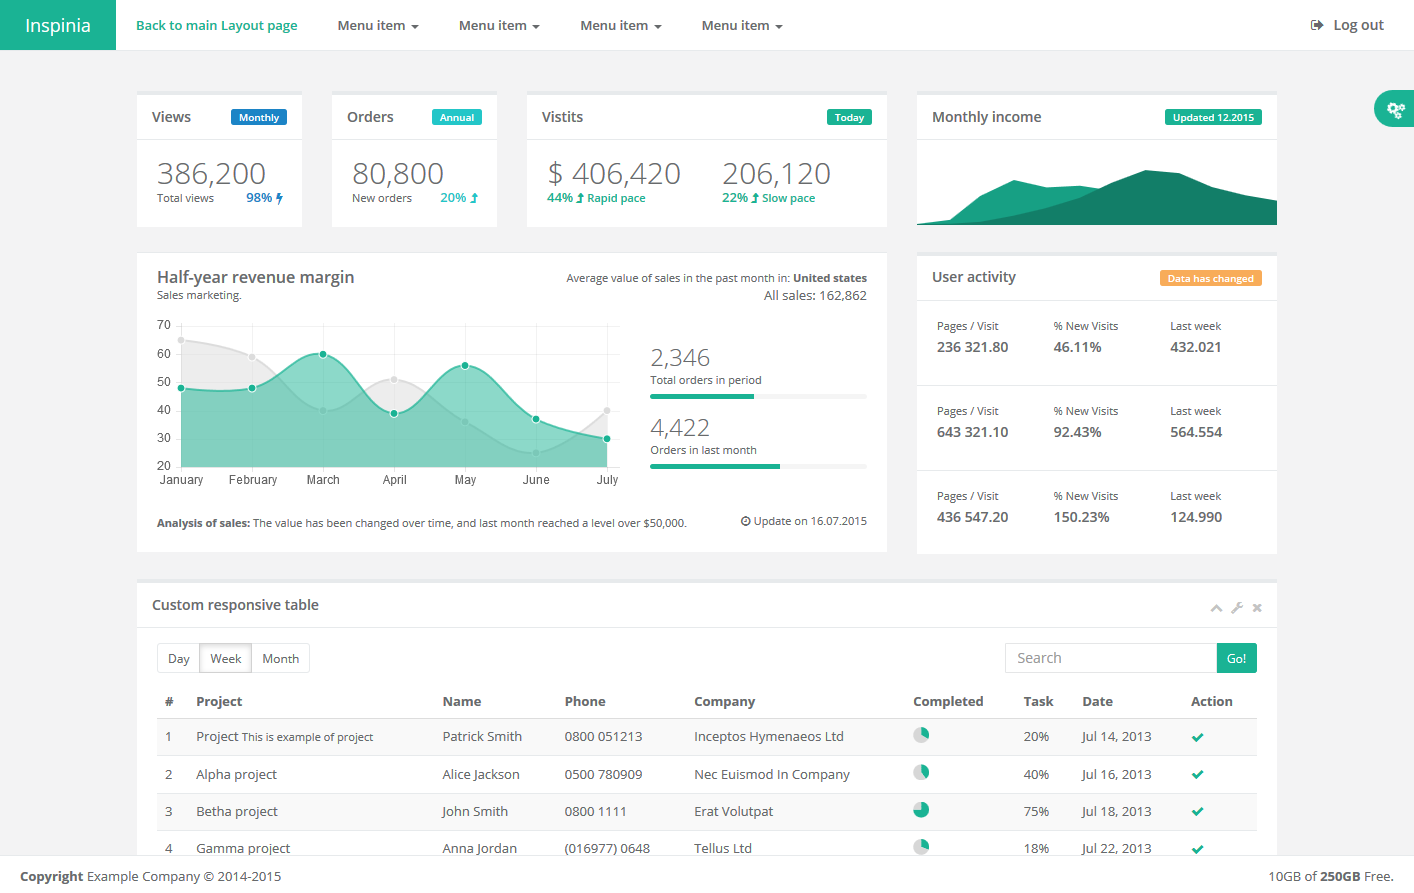
Layout 2
Layout 2 is a top navigation with centered content layout.
For layout 2 we prepared special examples files in views/common
-
content_top_navigation.html
-
top_navigation.html
To use layout 2 all you need to do is to specify it with your state: (example from dashbard 4). In first you need to specify the templateUrl
    .state('dashboards_top', {
            abstract: true,
            url: "/dashboards_top",
            templateUrl: "views/common/content_top_navigation.html",
        })
Next when you create new page all you need to do is to point to that abstract state like this:
.state('dashboards_top.dashboard_4', {
            url: "/dashboard_4",
            templateUrl: "views/dashboard_4.html",
            data: { pageTitle: 'Dashboard 4' },
    }
And you will get a Layout 2.
You have to remember that now your menu is located in views/common/top_navigation.html file.
Off canvas menu
Off canvas menu is a menu that not change the width of main wrapper page. It appear on top of the page.
To use off canvas menu you just need to add .canvas-menu to body element:
<body class="canvas-menu">
And add extra directives in navigation.html. Firstly add full-scroll directive to .sidebar-collapse element like:
<div class="sidebar-collapse" full-scroll>
Next add new clos-off-canvas directive after .sidebar-collapse element like:
    <div class="sidebar-collapse" full-scroll>
    <span close-off-canvas></span>
Skins
Inspinai theme has 3 diferent skins
To change skin you just have to add skin class to body element.
For example: to add skin Blue skin you just need to add .skin-1 class to body element.
In LESS files skins.less you can find style for the skin. Below is a representation of css classes demand color skin.
.skin-1 - Blue Light.skin-2 - Inspinia Ultra {for support with Inspinai Ultra please contact with support@webapplayers.com}.skin-3 - Yellow/purple.md-skin - Material Design Skin (In demo Inspinia Material Design version has also fixed sidebar and fixed navbar option)- Defaut skin does not need any class
Theme config
Theme config is the configuration box for setting options in live preview. It is placed in the right side of page with green icon.
To not add html code to all pages we just add js script to append the config box. The function is located in inspinia.js file with comment // Append config box / Only for demo purpose
If you want to remove the config box all you need to do is to remove function below this comment.
Angular Seed Project
It is an application skeleton for a typical AngularJS web app. You can use it to quickly bootstrap your angular webapp projects. It has all necessary resources/files to help you started new project.
As your project will grow you will need to add new resources. Look at the full version to select the elements and resources you want to use.
File strucutre for Seed Project
Angular_Seed_Project/
    ├── css/
    ├── font-awsome/
    ├── fonts/
    ├── img/
    ├── js/
    ├── views/
    ├── index.html
Angular Seed Project Grunt
It is an application skeleton for a typical AngularJS web app with implemented Grunt/Bower environment.
You can use it to quickly bootstrap your angular webapp projects. It has all necessary resources/files.
As your project will grow you will need to add new resources. Look at the full version to select the elements and resources you want to use.
First run
To run Angular Seed Project Grunt you will need a node instaled in your environment. If you don't have a node.js please go to this site http://nodejs.org and download and install proper version.
Next you will need to install grunt
npm install -g grunt-cli
Next you will need to install bower
npm install -g bower
And after that go to Angular Seed Project Grunt and run those commands to get all dependencies:
npm install
bower install
Grunt file is based on Yeoman angular generator with some changes. There are three main task that you can do:
-
grunt live to launch a browser sync server on your source files
-
grunt server to launch a server on your optimized application
-
grunt build to build an optimized version of your application in /dist
Angular Seed Project Gulp
It is an application skeleton for a typical AngularJS web app with implemented Gulp/Bower environment.
You can use it to quickly bootstrap your angular webapp projects. It has all necessary resources/files.
As your project will grow you will need to add new resources. Look at the full version to select the elements and resources you want to use.
First run
To run Angular Seed Project Gulp you will need a node instaled in your environment. If you don't have a node.js please go to this site http://nodejs.org and download and install proper version.
Next you will need to install gulp
npm install -g gulp
Next you will need to install bower
npm install -g bower
And after that go to Angular Seed Project Gulp and run those commands to get all dependencies:
npm install
bower install
Gulp file is based on angular gulp generator (https://github.com/Swiip/generator-gulp-angular). There are few main task that you can do:
-
gulp or gulp build to build an optimized version of your application in /dist
-
gulp serve to launch a browser sync server on your source files
-
gulp serve:dist to launch a server on your optimized application
-
gulp test to launch your unit tests with Karma
-
gulp test:auto to launch your unit tests with Karma in watch mode
-
gulp protractor to launch your e2e tests with Protractor
-
gulp protractor:dist to launch your e2e tests with Protractor on the dist files
In bower.js file there are specify needed resources for Seed Project.
Angular Seed Project MEANJS
It is an application skeleton for a typical AngularJS with MEANJS (http://meanjs.org/) - Version 0.4.2.
You can use it to quickly bootstrap your angular webapp projects. It has all necessary resources/files.
First run
To run MEANJS Angular Seed Project you will need a node instaled in your environment. If you don't have a node.js please go to this site http://nodejs.org and download and install proper version.
Next you will need to install Grunt
npm install -g grunt-cli
Next you will need to install bower
npm install -g bower
Next you will need to install mongodb. Please go to https://www.mongodb.org/downloads to install mongodb.
Next you will need to run your mongodb database. As it depends on your platform see mongodb site to run mongo database: http://docs.mongodb.org/manual/
And after that go to MEANJS Seed Project and run those commands to get all dependencies:
npm install
bower install
In bower.js file there are specify needed resources for Seed Project.
As this is only a theme to MEANJS we will not copy and put here full docs from MEANJS. Please go to MEANJS doc to get more info
how to use it http://meanjs.org/docs.html
If you have any questions feel free to contact with us: support@webapplayers.com
Change log 2.7 -> 2.7.1
Changed Inspinia js files
- inspinia.js - correct typos in fix_height function
CSS/LESS/SCSS/SASS
- Fix media-body style on right sidebar
- Fix form-control style to allow inout sizing
- Fix min-height issue with small content
- Fix background menu on md-skin
- Fix tabs in top-navigation layout
- Fix label style to release sizing option
Change log 2.6.2 -> 2.7
New view files
- views/activity_stream.html
- views/password_meter.html
- views/spinners_usage.html
- views/text_spinners.html
Changed views files
- index.html - update script links to jquery and jquery ui
- views/dashboard_3.html - update css class of sidebar
- views/form_advanced.html - add new example for switchery control
- views/helper_classes.html - change css name in border examples
- views/icons.html - update font awesome icons to new set
- views/layouts.html - correct typos in image names and descriptions
- views/mail_detail.html - correct typo in css clas
- views/skin-config.html - correct typo in css clas
- views/common/navigation.html - add links to new states
- views/common/navigation.html - correct href attribute for second level menu
New Inspinia js files
- No new files
Changed Inspinia js files
- config.js - add new states for new views
- controllers.js - update modalDemoCtrl() function
- controllers.js - add new function passwordMeterCtrl()
- directives.js - add new directive passwordMeter()
- directives.js - update sideNavigation() to handle auto collapse on state change
- directives.js - update iboxTools() and iboxToolsFullScreen() to handle nested iboxs
- inspinia.js - update fix_height() function - correct typo
- inspinia.js - move body-small mechanism outside document ready function
- inspinia.js - update selector for heightWithoutNavbar variable
Updates
- font-awesome/
- js/jquery/
- js/plugins/dataTables/
- js/plugins/ladda
- js/plugins/steps/
- js/plugins/switchery/
- js/plugins/validate/
New plugins
- js/plugins/pwstrength
- css/plugins/textSpinners
New images
- no new images
CSS/LESS/SCSS/SASS
- Fix jumping menu on landing page
- Fix bg-colors
- Remove rules for support old IE
- Add styles for third level menu on md-skin
- Improve select2 styles
- Improve menu style
- Clear overwrite native media-body classes
- Improve few styles for IE
- Improve style for summernote
- Correct selected typo
- Fix chat-avatar class rules
- Fix typo in css preprocessor variables
Change log 2.6 -> 2.6.2
Updates
- Bootstrap to 3.3.7
CSS/LESS/SCSS/SASS
- Fix the issue with hidden href on mobile mini navbar
- Fix the flickering menu
- Fix Safari modal issue
- Fix Summernote fullscreen mode
- Fix css width helper classes
- Improve content height on fixed navbar
- Improve landing page on mobile view
Change log 2.5 -> 2.6
New view files
- views/common/pdf_viewer.html - template for pdf
- views/autocomplete.html
- views/datamaps.html
- views/helper_classes.html
- views/pdf_viewer.html
- views/socialbuttons.html
Changed views files
- views/common/navigation.html - add new menu items
- views/form_advanced.html - add new features: tag input, dual select
- views/form_file_ipload.html - add new file input component
New Inspinia js files
- No new files
Changed Inspinia js files
- config.js - add new files for updated plugins
- controllers.js - add new controllers for new views
- directives.js - add new directive for tag input feature
Updates
- js/plugins/dropzone
New plugins
- js/plugins/datamaps
- js/plugins/dualListbox
- js/plugins/ngTags
- js/plugins/pdfjs
- js/plugins/topojson
New images
- no new images
CSS/LESS/SCSS/SASS
- Add styles for new pages
- Fix menu jumping issue
- Improve print mode for Firefox
- Improve chosen colors
- Fix boxes layout with md-skin
- Improve custom swithc style
- Add few new css classes - helper classes
Change log 2.4 -> 2.5
Please note that since Inspinia 2.5 we upgrade all Angular project to Angular 1.5 as well as all UI Bootstrap library to 1.1.2.
This update required to change all prefixes in UI Bootstrap - if you will update your exisitng project full migration path you can find here: https://github.com/angular-ui/bootstrap/wiki/Migration-guide-for-prefixes.
All current version are prepared with new prefixes.
New view files
- no new files
Changed views files
All changes for migration to new UI Bootstrap prefixes
- views/badges_labels.html
- views/buttons.html
- views/carousel.html
- views/draggable.html
- views/ecommerce_payments.html
- views/ecommerce_product.html
- views/faq.html
- views/form_advanced.html
- views/form_basic.html
- views/form_file_upload.html
- views/landing.html
- views/markdown.html
- views/notifications.html
- views/profile_2.html
- views/project_detail.html
- views/social_feed.html
- views/tabs.html
- views/tabs_panels.html
- views/tour.html
- index.html
- views/common/navigation.html
- views/common/footer.html
- views/common/ibox_tools.html
- views/common/ibox_tools_full_screen.html
- views/common/navigation_full_height.html
- views/common/navigation_off_canvas.html
- views/common/top_navigation.html
- views/common/topnavbar.html
New Inspinia js files
- No new files
Changed Inspinia js files
- config.js - add new files for updated plugins
- controllers.js - update prefixes for Modal controller
- directives.js - update dropzone and vectormap directive
- inspinia.js - update window resize event
Updates
- js/angular - update to 1.5
- js/bootstrap - UI Bootstrap to 1.1.2
- js/plugins/ui-select
- js/plugins/chosen
- js/plugins/dropzone
- js/plugins/ui-sortable
New plugins
- no new plugins
New images
- no new images
Change log 2.3 -> 2.4
New view files
- views/c3charts.html
- views/clipboard.html
- views/ecommerce_cart.html
- views/i18support.html
- views/markdow.html
- views/loading_buttons.html
- views/tour.html
- views/truncate.html
- views/tree_view.html
Changed views files
- views/common/navigation.html - add new menu elements for new views
- views/agile_board.html - add example code for serialize list
- views/form_advanced.html - add new Touch spin control
- views/landing.html - update page-scroll click event to close menu on select in mobile
- views/table_data_tables.html - replace old swf buttons with new button plugin (update datatables library)
- views/video.html - add script for handle full screen video option
- views/index.html - add angular-sanitize link
- views/index.html - add angular-sanitize link
New Inspinia js files
- No new files
Changed Inspinia js files
- config.js - Add new states
- controllers.js - Add three new controllers (loadingCtrl, datatablesCtrl, truncateCtrl, touchspinCtrl, tourCtrl, jstreeCtrl).
- directives.js - Add two new directives (resizeable, markdownEditor, touchSpin, truncate)
- inspinia.js - update fix_height function
Updates
- js/bootstrap - update to 3.3.6
- js/plugins/dataTables
- js/plugins/datepicker
- js/plugins/pace
New plugins
- js/plugins/touchspin
- js/plugins/jsTree
- js/plugins/ladda
- js/plugins/c3
- js/plugins/d3
- js/plugins/clipboard
- js/plugins/dotdotdot
- js/plugins/bootstrap-tour
New images
- imb/flags- Set of flags images
CSS/LESS/SCSS/SASS
- Add styles for new pages
- Fix buttons shadow on Chrome
- Fix dropdown text colour on md-skin
- Fix pace.js on fixed navbar option
- Fix few glitch animation effect
- Improve nav-tabs on mobile devices
- Fix second level menu on md-skin
- Improve RTL mode
- Add new fixed navbar option
- Ipmore print mode
Change log 2.2 -> 2.3
New view files
- views/contacts_2.html
- views/dashboard_5.html
- views/ecommerce_payments.html
- views/ecommerce_product_detail.html
- views/masonry.html
- views/profile_2.html
- views/slick.html
- views/toastr.html
- views/vote_list.html
- views/common/ibox_tools_full_screen.html
Changed views files
- views/common/navigation.html - add new menu elements for new views
- views/dashboard_4_1.html - Remove 'p-xl' class from wrapper
- views/foo_table.html - Update ibox tools code
- views/form_advanced.html - add select2 examples
- views/project_detail.html - Change animation effect
- views/tabs_panels.html - add example of fullscreen panel and slim scroll panel
- views/index.html - add angular-sanitize link
New Inspinia js files
- No new files
Changed Inspinia js files
- app.js - Add ngSanitize module to app
- config.js - Add new states
- controllers.js - Add three new controllers (dashboardFive, selectCtrl, toastrCtrl).
- directives.js - Add two new directives (iboxToolsFullScreen, slimScroll)
Updates
- js/bootstrap - update to 3.3.5
- js/plugins/dataTables - update to 1.10.8
New plugins
- js/plugins/select2 (with css files)
- js/plugins/masonry (with css files)
- js/plugins/slick (with css files)
New images
- css/patterns- Add images for header in Material Design skin
CSS/SCSS/SASS
- Add styles for new pages
- Add new md-skin styles
- Fix ibox-tools when title is large
- Fix landing page menu on small devices
- Fix modal open backdrop with animate.css effect
- Fix dropdown orientation under ibox
- Fix profile menu on fixed sidebar
Change log 2.0/2.1 -> 2.2
New view files
- views/chartist.html
- views/ecommerce_orders.html
- views/ecommerce_product.html
- views/ecommerce_product_list.html
- views/ecommerce_products_grid.html
- views/foo_table.html
- views/metrics.html
- views/social_feed.html
- views/sweet_alert.html
- views/tabs.html
- common/navigation_full_height.html
- common/navigation_off_canvas.html
- views/off_canvas.html
- views/outlook.html
- Incorporate Landing page and other views to full version
- views/errorOne.html
- views/errorTwo.html
- views/forgot_password.html
- views/landing.html
- views/lockscreen.html
- views/login.html
- views/login_two_columns.html
- views/register.html
Changed views files
- views/common/navigation.html - add new menu elements for new views
- views/common/navigation.html - added ".metismenu" class to nav element id="side-menu" (new version of metisMenu)
- views/common/topnavbar.html - Fix links from dropdown
- views/article.html - Add example of comments section
- views/form_advanced.html - Add new new plugins
- views/tabs_panels.html - add example of footer to panel and initial collapsed panel
- views/chat_view.html - Add left/right class to chat panels
- views/landing.html - Add new sections: timeline and comments
- index.html - Update attributes of body tag
New Inspinia js files
- No new files
Changed Inspinia js files
- inspinia.js - Update fix_height for handle height wrapper on fixed-nav
- translations.js - Add new translations for new pages
- directives.js - Add three new directives (clockPicker, landingScrollspy, fitHeight)
- controllers.js - Add three new controllers (chartistCtrl, metricsCtrl, sweetAlertCtrl), add daterange variable.
- config.js - update jvectormap links, add new states for new pages,
add new links for new plugins, fix datatables reslove loadPlugin funciton
Updates
- js/plugins/metisMenu - update to 2.0.2
- js/plugins/slimscrol - update to 1.3.6
- js/plugins/jvectormap - update to 2.0.2
- js/plugins/moment - update to 2.9.0
New plugins
- js/plugins/clockpicker (with css files)
- js/plugins/daterangepicker (with css files)
- js/plugins/footable (with css files)
- js/plugins/sweetalert (with css files)
- js/plugins/chartist
- css/plugins/awesome-bootstrap-checkbox
New images
- img/landing - Full folder of images used in landing page
CSS/SCSS/SASS
- Add styles for new pages
- Add new metisMenu style
- Add landing page styles
- Add chat-discussion left/right class
- Fix z-index of modal-dialog
- Fix margins on wrapper when fixed-nav is enabled
Change log 2.0 - 2.1
Version 2.1 is mainly focused on MeteorJS to provide Meteor version.
Please stay tuned for 2.2 version to get new features for Angular version.
Change log 1.9 -> 2.0
New view files
- forgot_password.html
- views/agile_board.html
- views/article.html
- views/blog.html
- views/clients.html
- views/diff.html
- views/draggable.html
- views/idle_timer.html
- views/issue_tracker.html
- views/live_favicon.html
- views/spinners.html
- views/teams_board.html
- views/validation.html
- views/content/right_sidebar.html
Changed views files
- index.html - add angular-idle scirpt
- views/chat_view.html - Add new small-chat element
- views/content.html - Add new right sidebar (ng-include)
- views/navigation.html - Add new menu elements
- views/topnavbar.html - Add new menu element for right sidebar
- views/dashboard_1.html - Add small-chat element
- views/dashboard_2.html - Add small-chat element
- views/dashboard_3.html - Add small-chat element
- views/dashboard_4_1.html - Add small-chat element
- views/faq.html - Fix the collapse effect - Create new div element
.faq-answer before p answer.
New Inspinia js files
- No new files
Changed js files
- js/app.js - Add new module ngIdle
- js/config.js - New states for pages, add initial settings for Idle directive
- js/controllers.js - Add new controllers:diff, idleTimer, liveFavicon, formValidation, agileBoard, draggablePanels
- js/directives.js - Add new directives:chatSlimScroll, customValid, fullScroll, closeOffCanvas
- js/inspinia.js - Improve fix_height function, add function for handle right-sidebar position on scroll
Updates
- js/plugins/pace - update Pace to 1.0
- js/morris/morris.js - update to 0.5
- bootstrap - update to 3.3.4
New plugins
- js/plugins/diff_match_patch - Google algorithm for diff functionality
- js/plugins/angular-diff-match-patch
- js/plugins/angular-idle
- js/plugins/tinycon
- js/plugins/ui-sortable
New images
- img/full_height.jpg
- img/off_canvas.jpg
CSS/SCSS/SASS
- Add styles for new pages
- Improve btn-link
- Add colapsed class for initial collapsed ibox
- Fix margins for footer with sidebar fixed
- Fix responsive in login page
Change log 1.9 -> 1.9.2
Version 1.9.2 is mainly focused on Ruby on Rails to provide Rails version.
Please stay tuned for 2.0 version to get new features for Angular version.
Change log 1.8 -> 1.9
New view files
- login_two_columns.html
- views/chat_view.html
- views/dashboard_4.html
- views/dashboard_4_1.html
- views/layouts.html
Changed views files
- index.html - move all elements from body to one
<div ui-view></div> to allow create diferent layouts page
- views/basic_gallery.html - Add new plugin blueimp with lightbox effect
- views/buttons.html - Fix dropdown markup for UI bootstrap 0.12
- views/css_animation.html - As this is state without abstract state we add elements from content.html
- views/dashboard_1.html - Add some translate text
- views/form_advanced.html - Add image crop function
- views/form_basic.html - Fix dropdown markup for UI bootstrap 0.12
- views/grid_options.html - As this is state without abstract state we add elements from content.html
- views/widgets.html - As this is state without abstract state we add elements from content.html
New js files
- js/translations.js - New file for all translate variables
Changed js files
- js/app.js - Add new module ocLazyLoad and remove all module that will be included with lazy load
- js/config.js - Add and specify all resources for all state with ocLazyLoad
- js/controllers.js - Remove
morrisChartCtrl controller. Add translateCtrl and imageCrop
- js/directives.js - Remove
fancyBox and morris directives. Change sideNavigation directive and add $timeout function for metsiMenu.
Updates
- js/plugins/flot - update Flot chart library to version 0.8.3
- font-awesome - update Font awesome to version 4.3.0
New plugins
- js/plugins/blueimp - new plugin for lightbox gallery
- js/plugins/ngImgCrop - new plugin for image crop
- js/angular-translate- new plugin for multi language support
New images
- img/gallery - new set of images for lightbox gallery page
- img/dashbbard4_1.jpg
- img/dashbbard4_2.jpg
Contact
Contact as with email: support@webapplayers.com